Routes
This chapter covers the route function. The procedures are shown in this video.
The route editor
The easiest way to create a route is directly from the navigation page using the button.
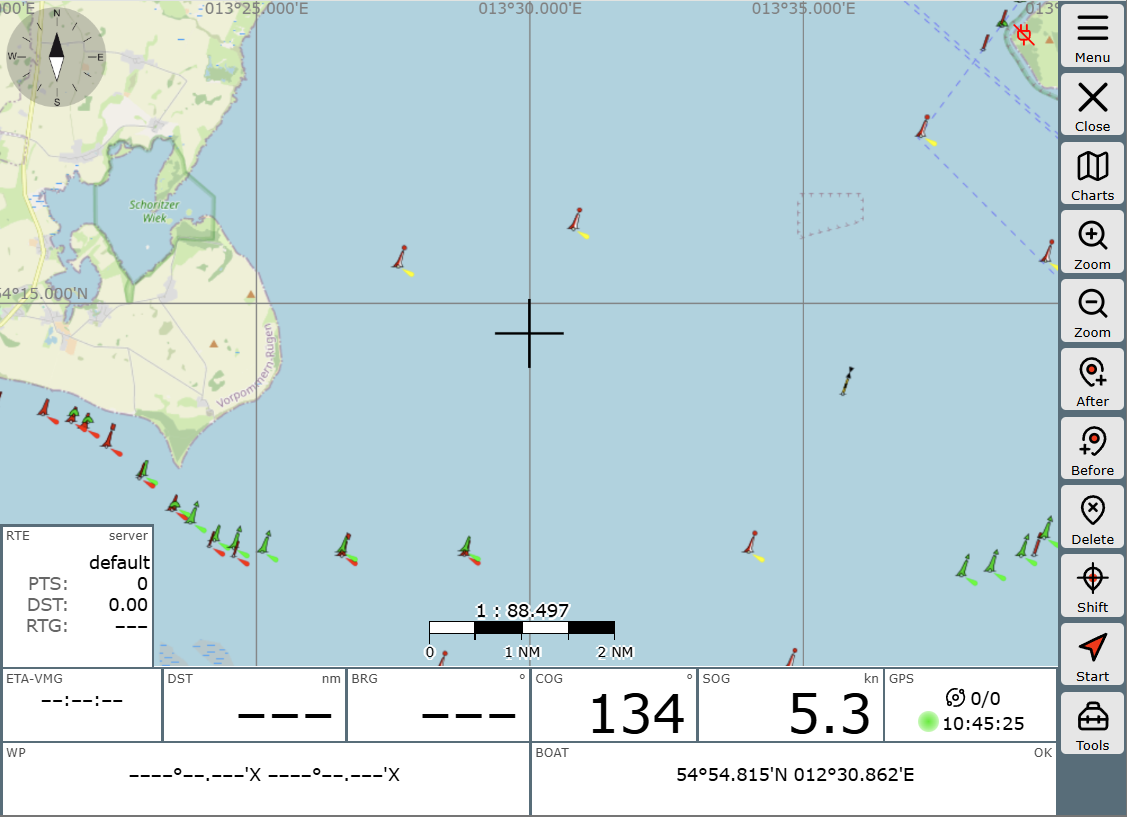
The map view remains, but the button bar on the right has changed.
-
New route
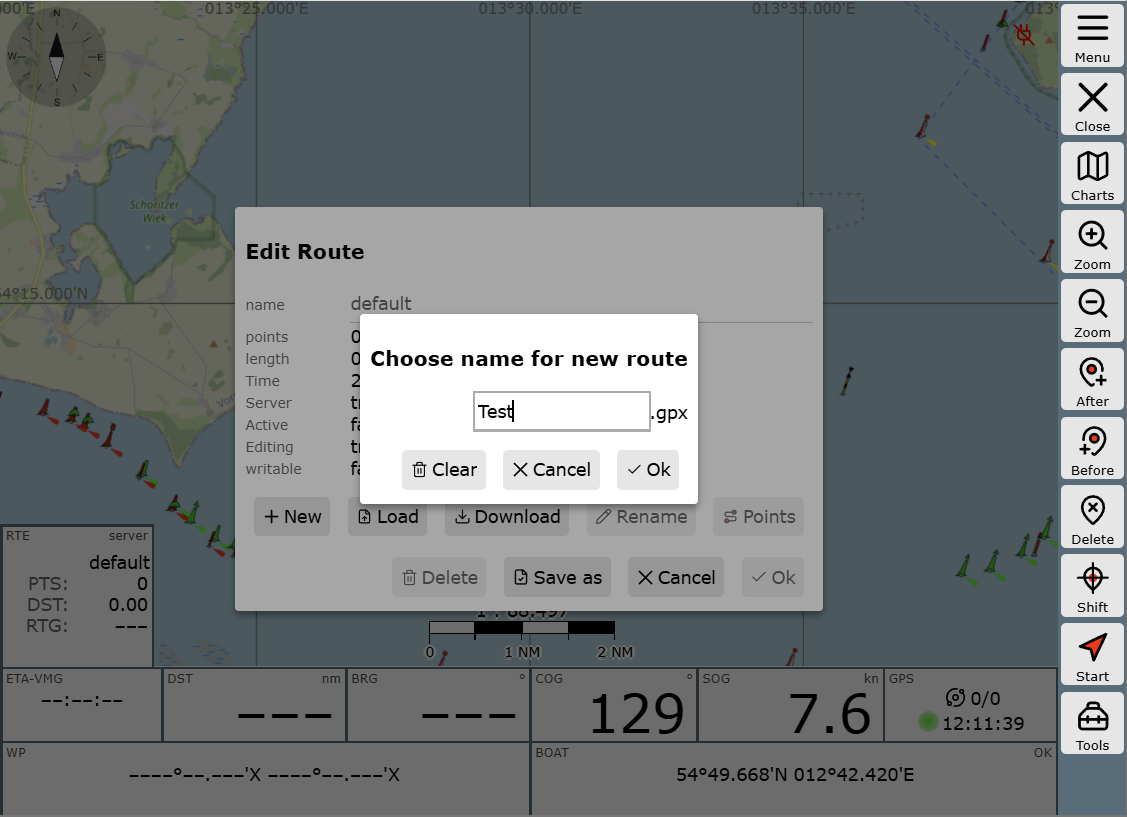
Click into the route widget (RTE) at the bottom left and create a new route by clicking on , giving the route a new name (e.g., "Test"), and confirming twice with .
Subsequently, the dialog in the widget will show that the route "Test" is now loaded and contains no waypoints yet.
-
Setting waypoints
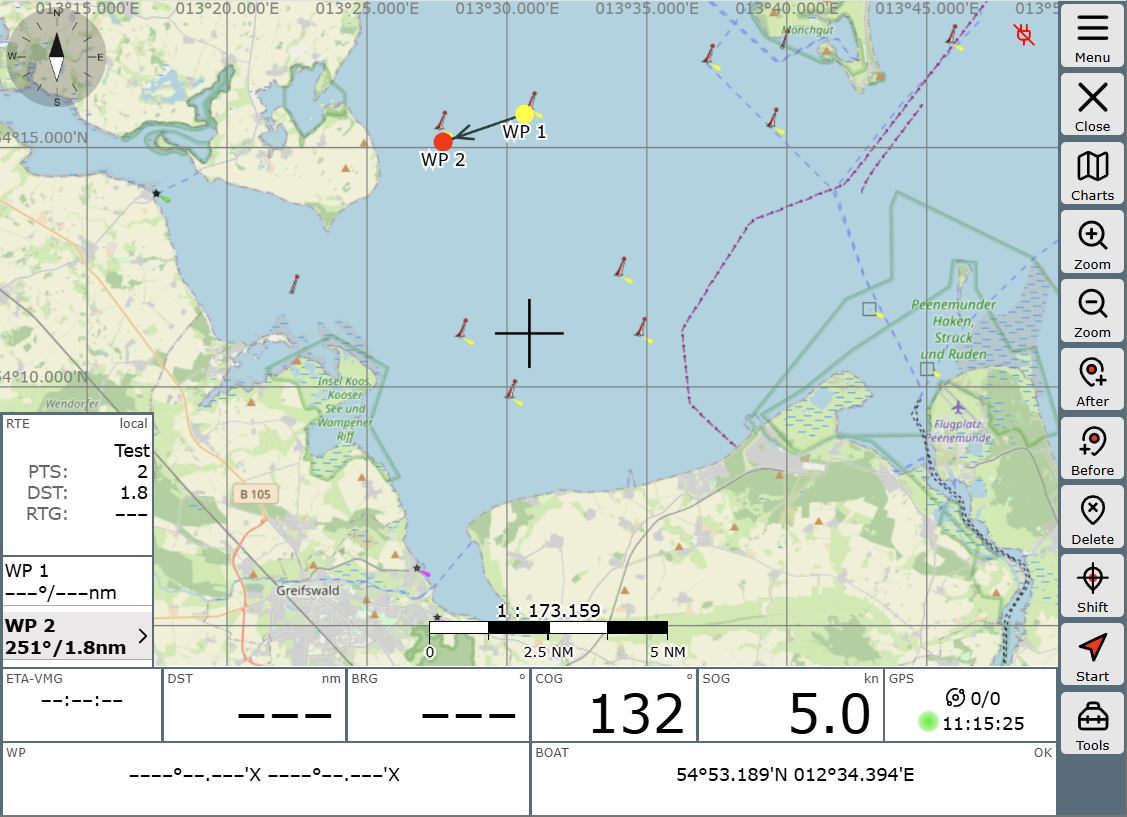
Waypoints are set in AvNav by moving the crosshair to the position where the waypoint should be placed. This is done by clicking on . 'After' and 'Before' refer to the currently selected waypoint.
This waypoint is highlighted in red on the map and in bold in the WP list of the RTE widget. In this example, you create the route WP1->WP2->WP3 at the crosshair using the button. Consequently, using the button results in the route WP1->WP3->WP2
-
Editing waypoints
To move a waypoint, it must first be selected directly. This can be done either by clicking on it in the map or by selecting its list entry in the RTE widget. Then, position the crosshair at the desired location and move the waypoint using .
Similarly, you can delete a waypoint using the button.
Working with the crosshair may seem a bit cumbersome at first compared to direct clicks on a touchscreen. However, in situations with a heavily moving ship, on a smaller screen, and with cold fingers, you will appreciate this method of operation.
Saving and loading routes
Changes to routes are generally saved immediately on the AvNav server. If this system behavior is undesirable, for example, because you are editing the currently active route, the so-called disconnected mode is recommended: changes remain locally in the browser and are not synchronized to the server until further notice.
This separation is achieved by deactivating the connected mode via the button in the display area of the "Routes" section. Changes remain local until you re-activate the connected mode - you will then be asked what should happen with the changes; they can be applied or discarded.
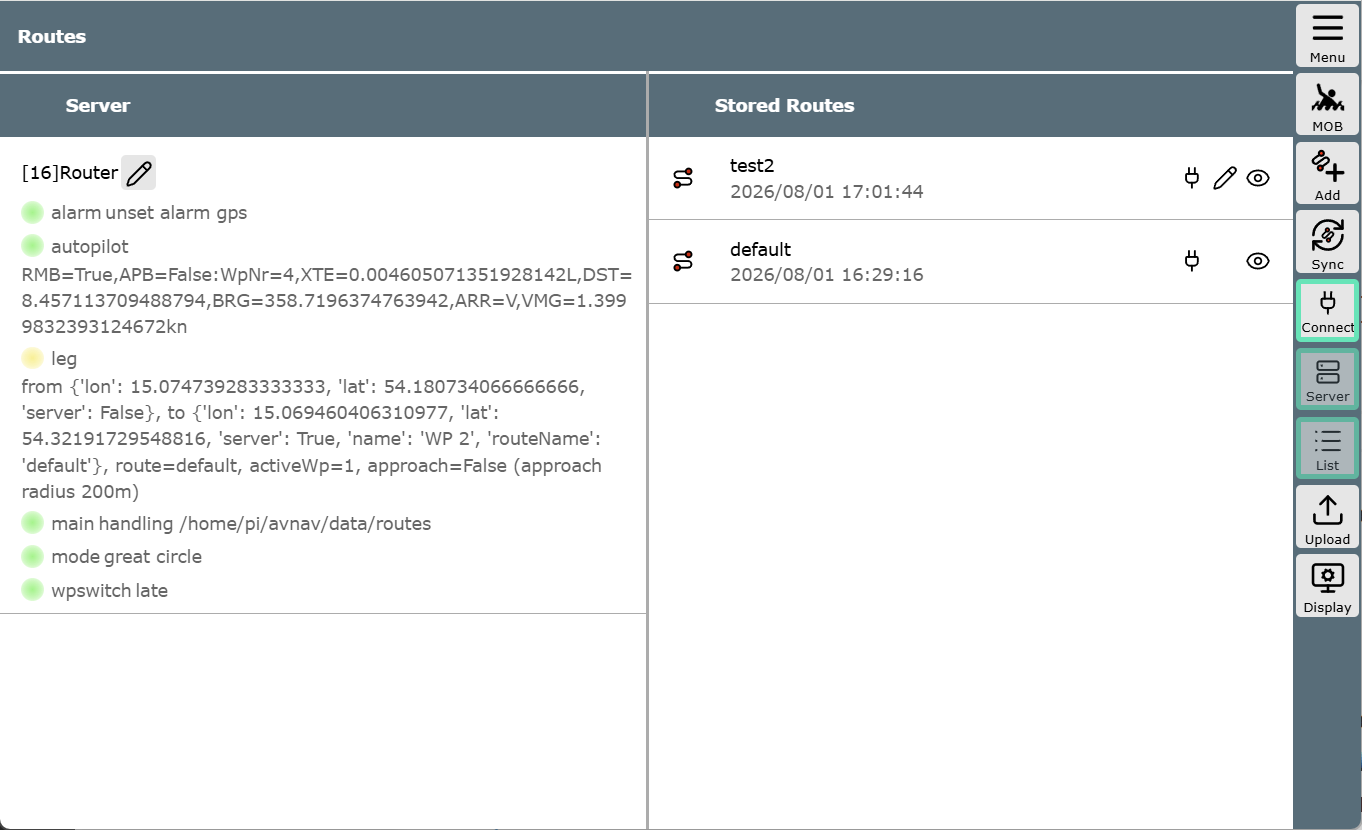
The saved routes are listed in the second column. There, you can, among other things, delete, copy, download, import from *.gpx files, or edit them. On narrow screens, this second column might not be visible - you can access it by swiping.
WP buttons
When editing, but also when using a route, further options are available if you click the button and then in "Navigation tools".
The buttons and move the selection from waypoint to waypoint if working within the widget or on the map is found to be less convenient.
Via , each individual waypoint can be edited, for example, to assign a new name.
With , you can quickly bring the selected waypoint back into the map window if the map has been moved elsewhere for any reason. This can also be done by clicking on the waypoint in the RTE widget.
Activating a route
Once all entries are finished, the route can be activated. This is done by clicking the start button . Before doing so, check which waypoint is currently active - the route will start from there. We therefore set WP 1 as the first leg from our position and click on .
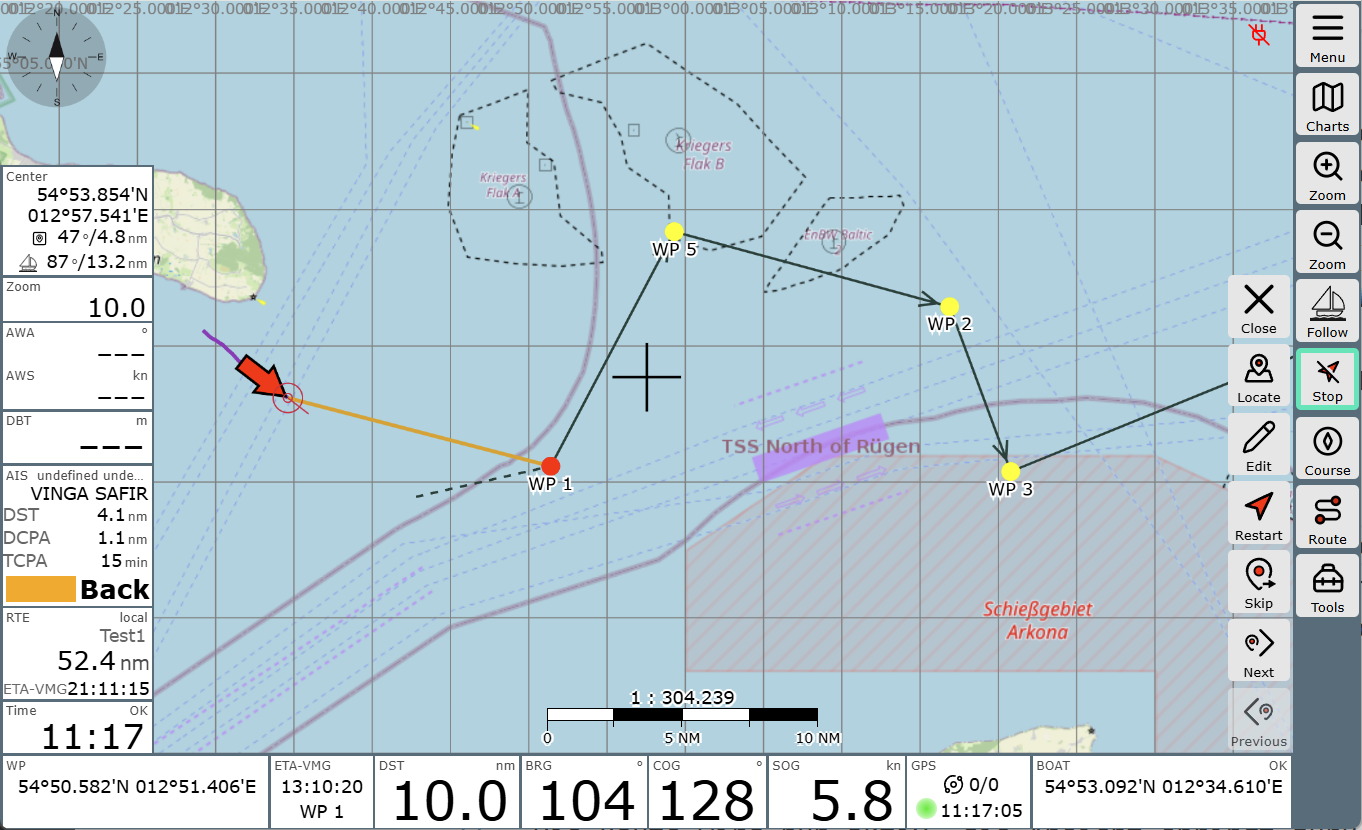
The route becomes active, and the view jumps back to the normal navigation window. The button becomes . This can be used to deactivate the route. You can also tell that the route is active by the fact that the direction to the WP is shown as an ochre-colored line and the widgets contain route-related values, such as the distance to the next waypoint (DST), the bearing (BRG) to it, and in the RTE widget, the length of the route and the ETA.
The WP buttons also offer useful functions while sailing the route. If you decide spontaneously to skip a waypoint without wanting to change the sequence of the route, is the right choice: if you click it, the route jumps to the next waypoint. This can be helpful if you pass a waypoint at such a great distance that the system does not automatically acknowledge reaching it.
The course to the next waypoint is automatically updated and displayed by default as an ochre-colored line. The course determined at the beginning of the leg is shown as a dashed black line. The button performs a new initial calculation (e.g., after moving the waypoint underway) - during which XTE is reset: the dashed and the ochre-colored lines lie together again.
Details
Waypoint auto-advance
For automatic advance to the next waypoint in a route, two conditions must always be met:
-
The boat must be within the approach area of the waypoint. The distance is set under
-> -> -> "Approach"
Reaching the approach area is indicated by a triggered waypoint alarm and a red display in the Route widget. -
Depending on the mode set under
-> -> "Router" -> "nextWpMode"- "late": The distance to the current waypoint no longer decreases, but the distance to the next waypoint decreases. (Default setting and older versions)
- "90": The waypoint is "abeam" (more precisely: the boat has crossed a line +/- 90° to the original waypoint course)
- "early": After the waypoint alarm, the advance occurs after an (adjustable) time without further conditions.
It is important to note that the automatic advance only occurs if both criteria (1 and 2) are met.
If manual advance is desired, you can display the waypoint buttons at any time by clicking the widgets at the bottom left or via -> and use the button.
Route mode
great circle
Here, a route is calculated so that you have the shortest path between start and finish. The disadvantage is that the course changes constantly during the route. In the map display, such a route is not a straight line, but a curve.
In older versions, AvNav always calculated great circle routes, but displayed them (incorrectly) as straight lines.
For shorter distances (< 100nm), this is of no practical importance.
rhumb line
Here, the route is calculated so that a constant course can be steered. The map display is a straight line.
The switch is made via
->->"Router"->->"useRhumbLine"
For the tool, the mode can be set separately in the Web App settings:
->->"Navigation"->"Measure rhumbLine"
This allows the two paths to be easily compared.
Disconnected mode
AvNav makes it possible to edit or change routes while a route is currently active. This allows, for example, a navigator to create and compare different alternatives while the helmsman can follow the current route undisturbed.
This is what the so-called "Disconnected" mode is for. In this mode, all route functions only take place locally on the display device (browser). In this mode, most write operations to the server are suppressed.
Via
->->
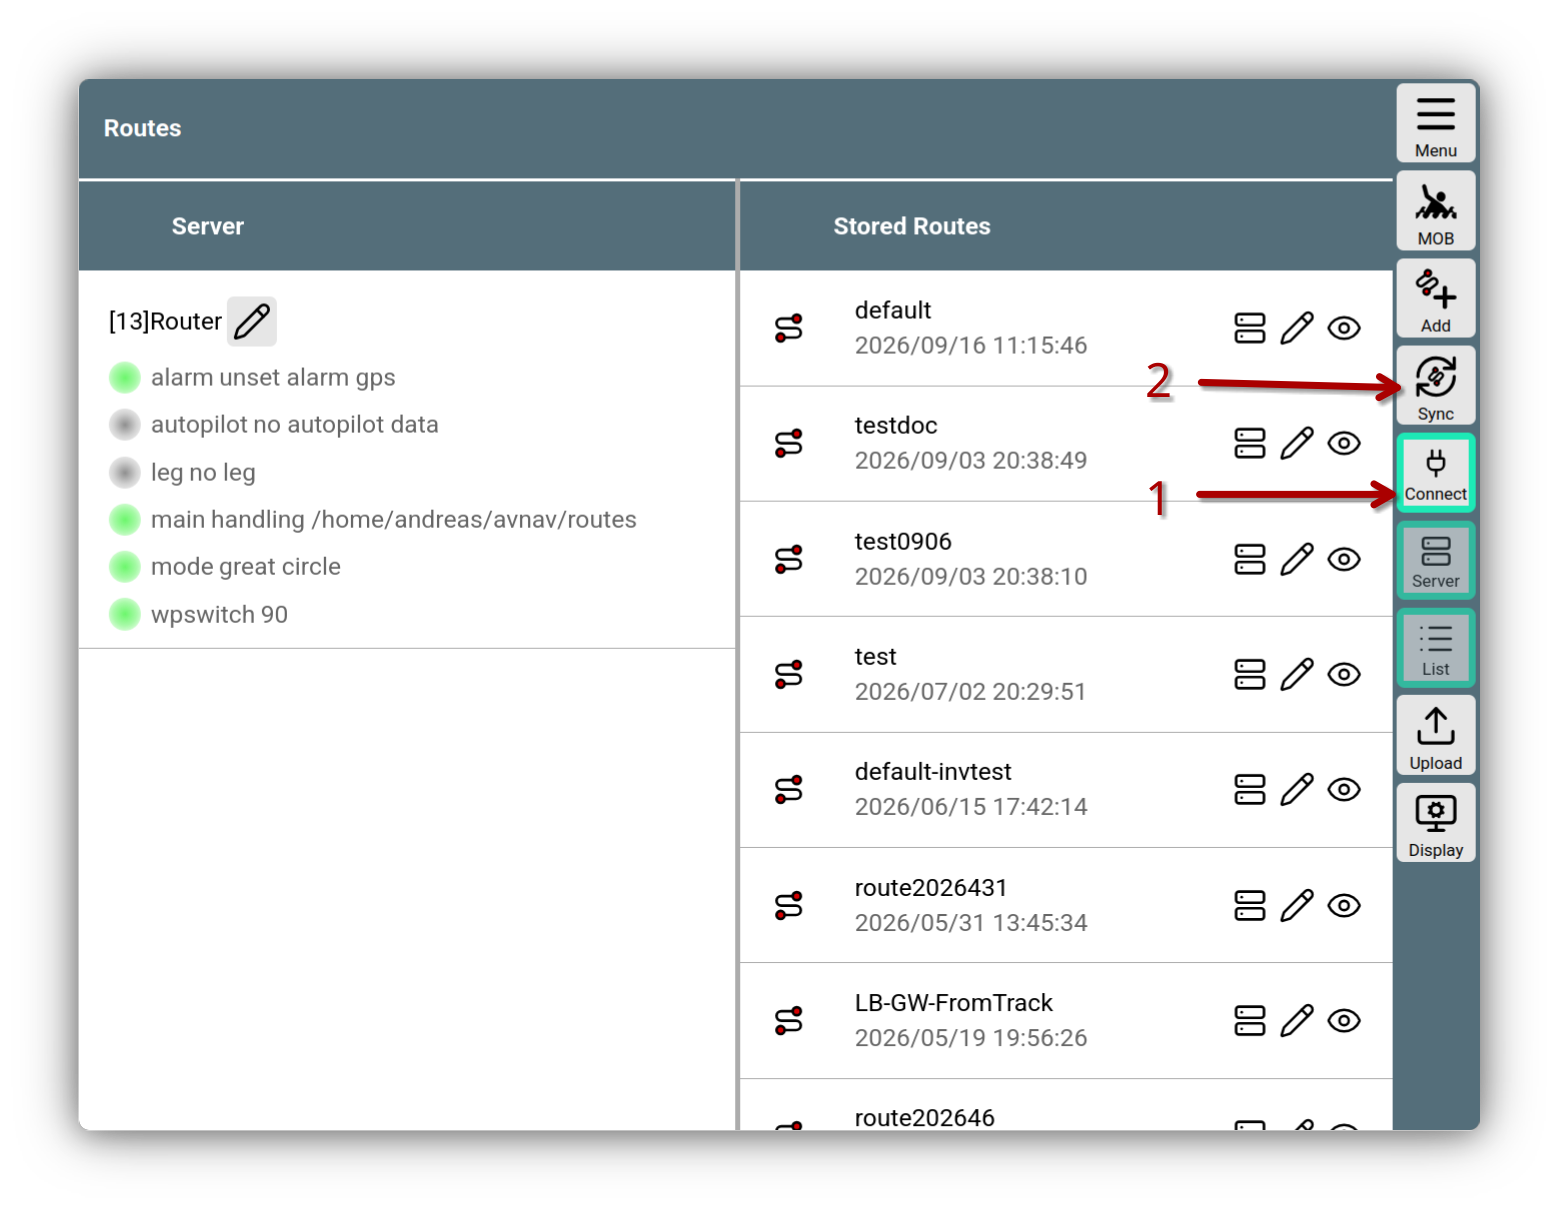
this mode can be activated and deactivated: (1) in the image. The button is green when the mode is switched off (i.e., when routes are being edited on the server).
Route Disconnected
Via the button (2), the routes can be synchronized with the server.
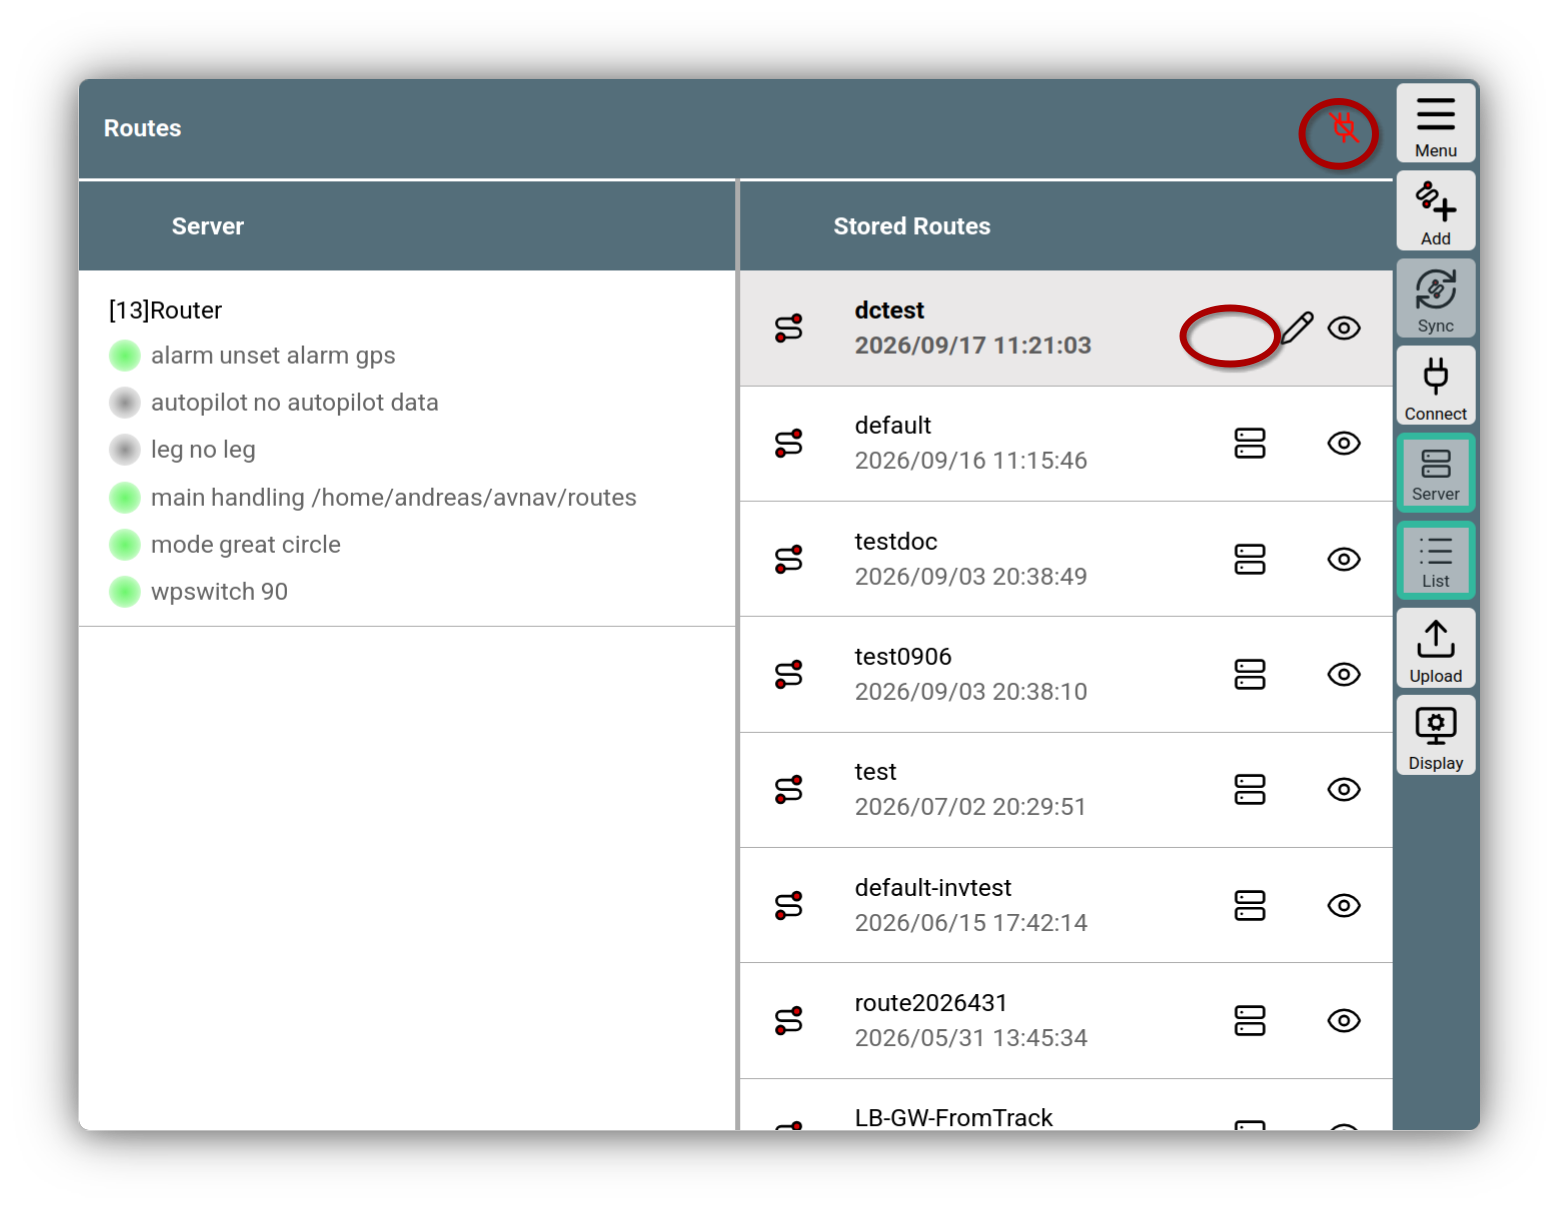
If "Disconnected" mode is active, this is indicated by a red icon in the title bar.
Route Disconnected active
In this mode, you cannot edit routes that are stored on the server . You can recognize this by the missing icon for such routes. However, you can create a copy and edit that.
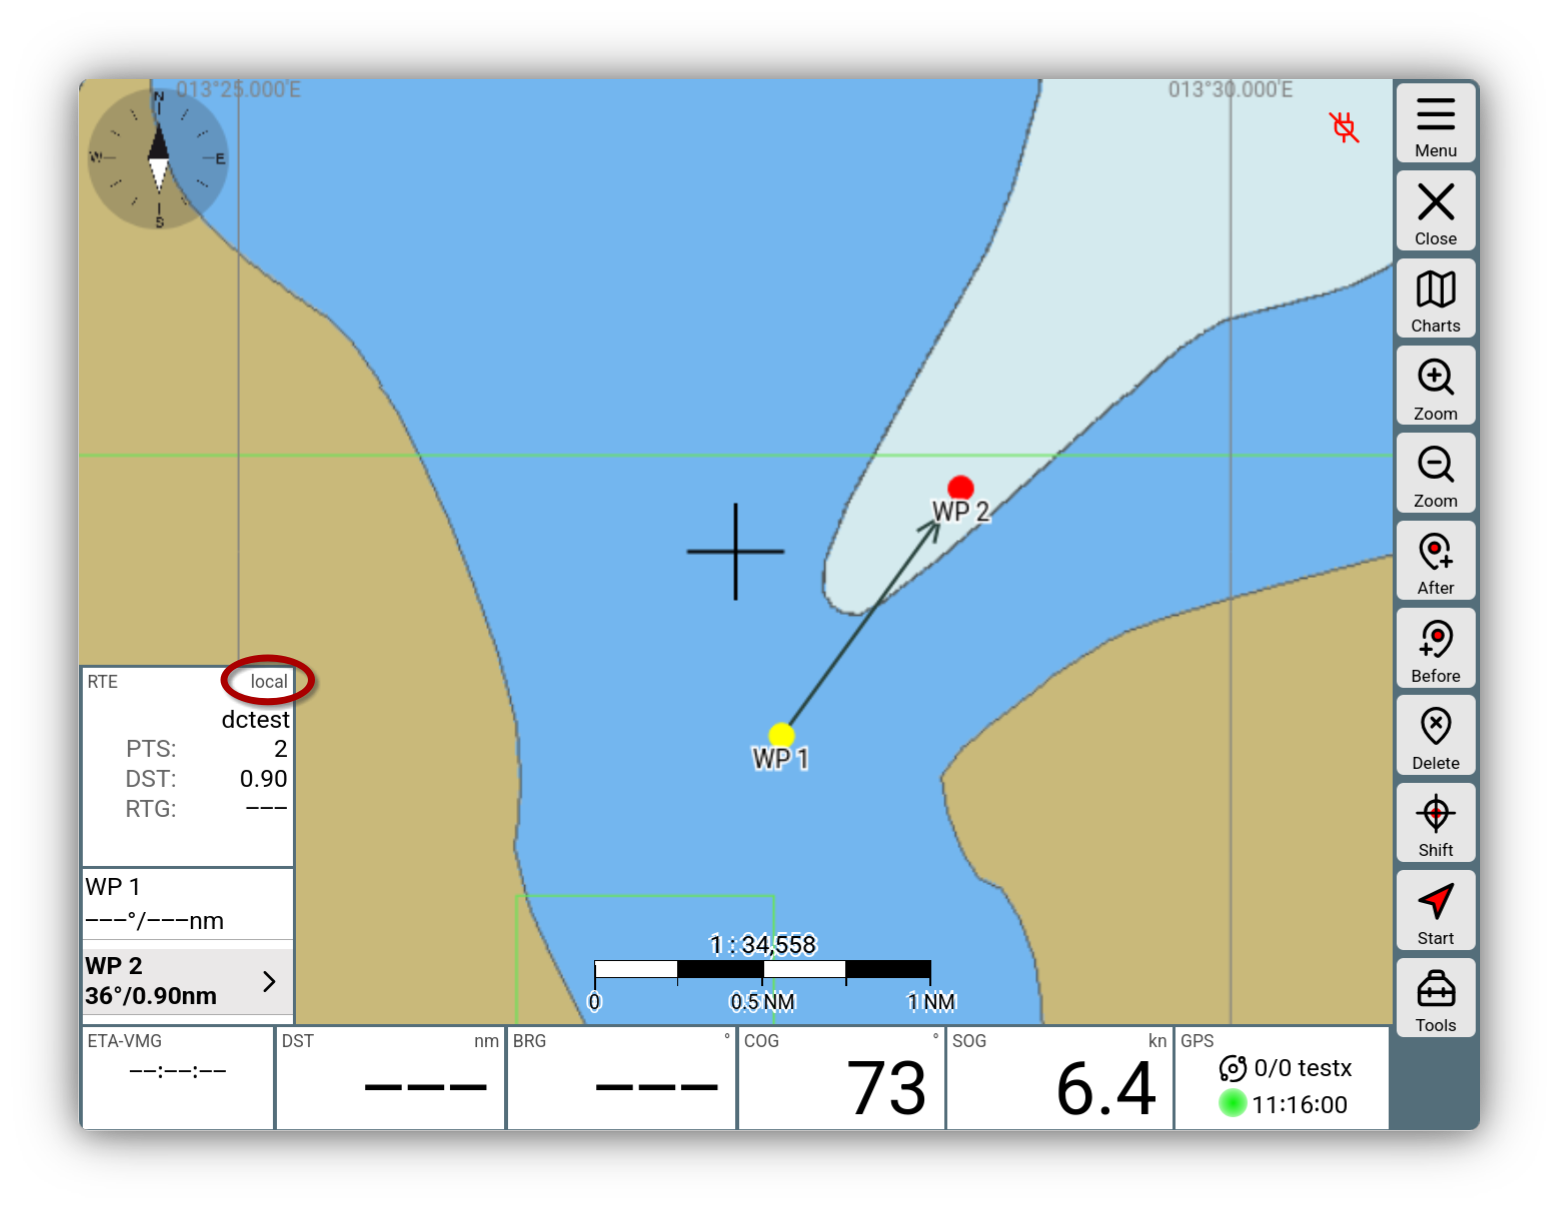
In the route editor (and also during navigation), the route widget shows whether it is a local route.
Local route
You can start such a local route normally - and all route functions are available. However, there are the following limitations:
- No output of RMB and APB data sets, no transfer of the route to SignalK
- No waypoint alarm
Synchronizing routes
Via the icon in the title bar or via
->->
you can leave the "Disconnected" mode again.
AvNav then compares the locally stored routes with those currently present on the server and offers synchronization.
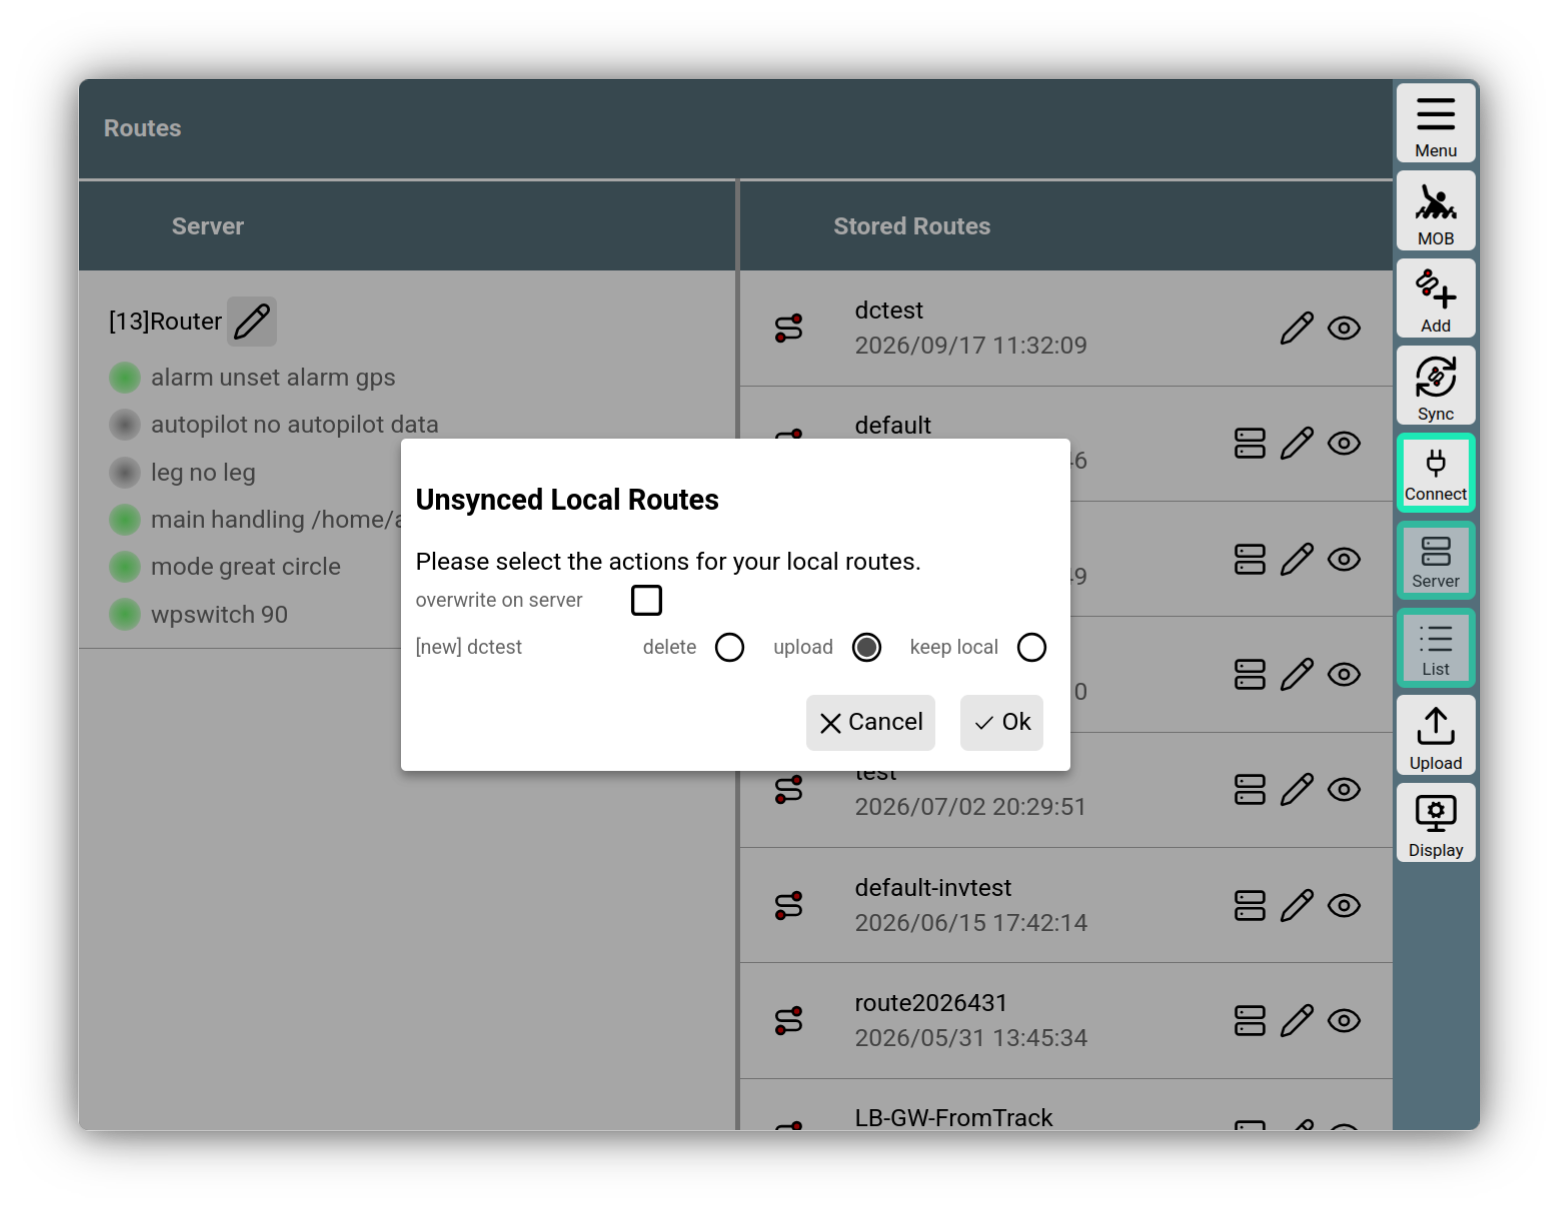
Route synchronization
For each local route, the possible options are offered:
- delete: Deletes the local route
- upload: Uploads the route to the server
- keep local: Keeps the local route
upload is only offered if the route does not exist on the server - or if overwrite on server has been activated.
With the button, you can re-initiate this synchronization at any time.
Combining routes
If you want to add parts of one route to another, you can do this by configuring the route from which you want to add parts as an Overlay on the current map.
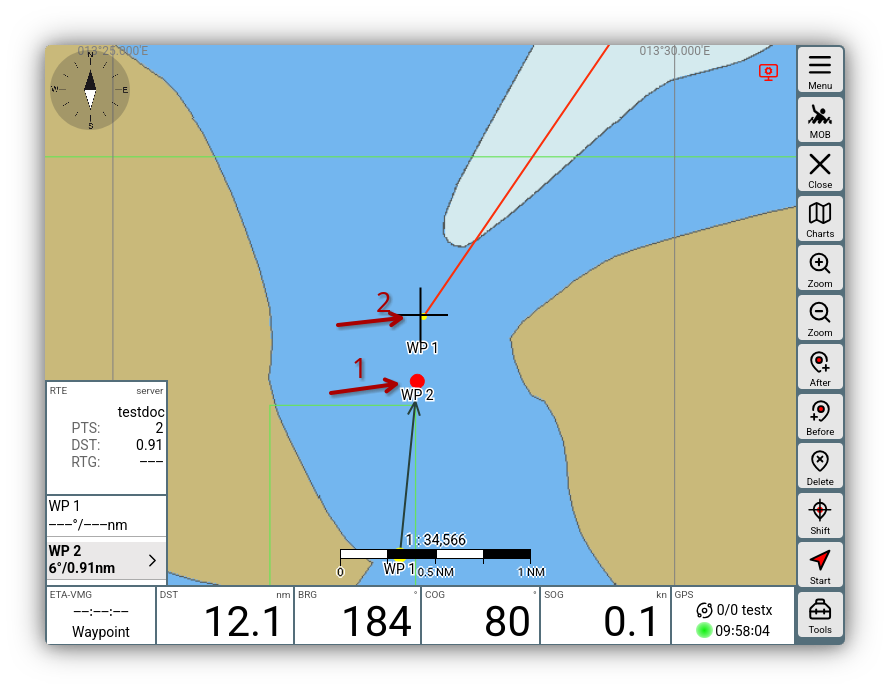
Then switch to the Route Editor, activate the point of the route (1) after which you want to insert the other route, and click on the point of the overlay route (2) from which you want to insert.
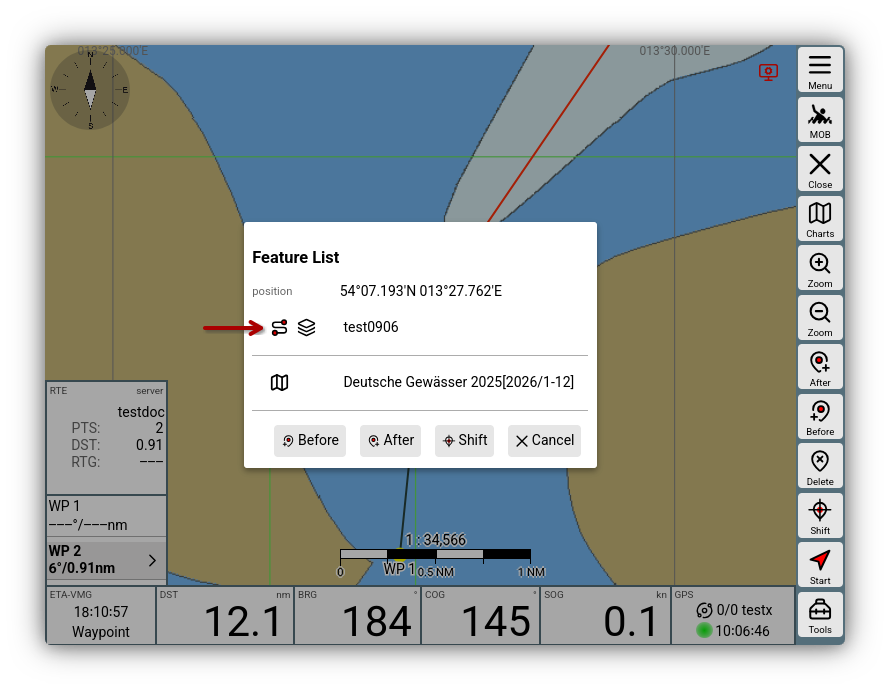
After clicking on the overlay route, you can then insert the route with .
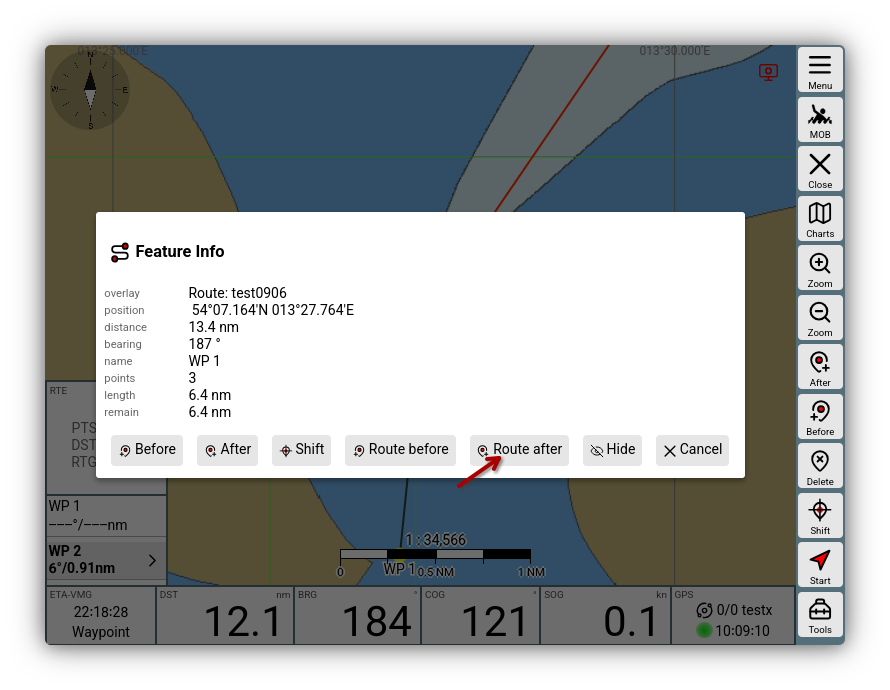
The points of the overlay route are then copied into the current route.